Creating Custom System Families – Chapter 4 Ceilings
In this chapter I will show you how you can create a new custom ceiling type within Revit. I will also explore some of the customisation options available to you.
Steps:
1.Getting Setup
2.Name Your New ceiling Type
3.Editing the Structure
4.Saving your System Family
Step 1. Getting setup
When I am creating a new ceiling type the very first step I take is to choose any pre-existing ceiling type and place a short section of ceiling to work with:

Now that we have a small section of ceiling placed in Revit we will now convert this into my new custom ceiling type using the below instructions.
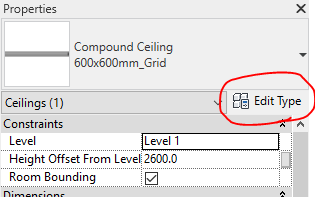
Step 2. Name Your New ceiling Type
1. Select the section of ceiling you have placed
2. In the properties window click the “Edit Type” button:
3. In the Type Property window which opens click the Duplicate button in the top Right:
4. Name your new ceiling type and click OK:
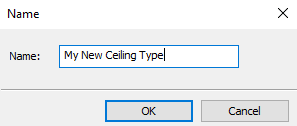
Congratulations, you have now created a new ceiling type within Revit.
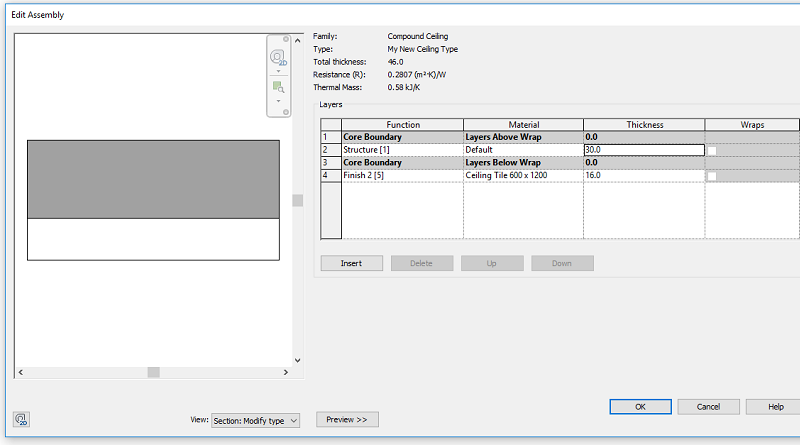
Step 3. Editing the Structure
Editing the structure is a big step as this is where you will be doing most of the customisation and will take a little more explaining.
1. In the Types Properties Window click the “Structures” button.
2. This will open the Edit Assembly Window.
3. If not already on click the Preview button at the bottom to activate a preview of your ceiling type.
4. Next in the Layers table delete the existing layers by selecting them and then clicking the “Delete” button.
5. Use the insert button to add the layers to your ceiling and use the up and down button to position them. For this example I have created 2 layers:
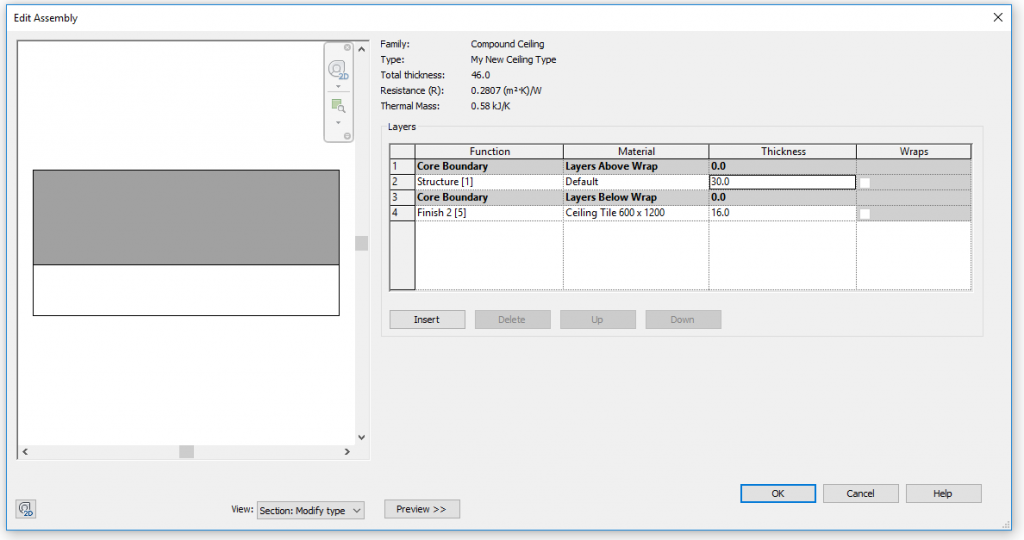
6. With the layers created and positioned, simply click in the boxes to set the function, material and thickness, you can also set layers to wrap.
At this point your settings are not yet saved! If you accidently exit this window without clicking OK you will lose your settings.
7. The next step is to click OK to leave the Edit Assembly window and OK again to leave the Edit Type window.
8. You should now see the section of ceiling placed update with your new custom layers.
Step 5. Saving your System Family
You can save your system families to your computer if you wish to be able to use them in other projects. To do this please follow my guide on how to save and load system projects:
Saving your Revit System Families
Back to Creating Custom System Families