Change Revit Family Thumbnail Image
Want to change the thumbnail image preview for your Revit family? follow the below instructions to find out how in 4 easy steps.

Why Change?
When you save you Revit family Revit will automatically generate a thumbnail image of your family, this image however may not be what you want to be dispayed on the thumbnail.
Alot of Revit families with have multiple types ranging from different measurements, materials and with features turned off and on.
Being able to set the thumbnail manually allows you to chose a better image to represent your family.
How To Change The Thumbnail
Following the below instructions I will show you how you can set or change the thumbnail for your revit family.
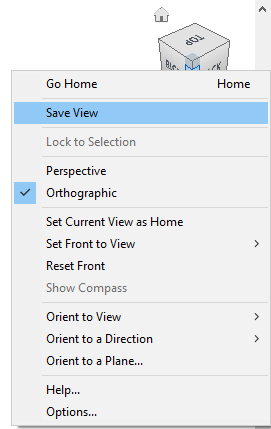
1. Save a 3D View
In the family editor save a new 3D view by right clicking on the view cube and choosing “Save View”
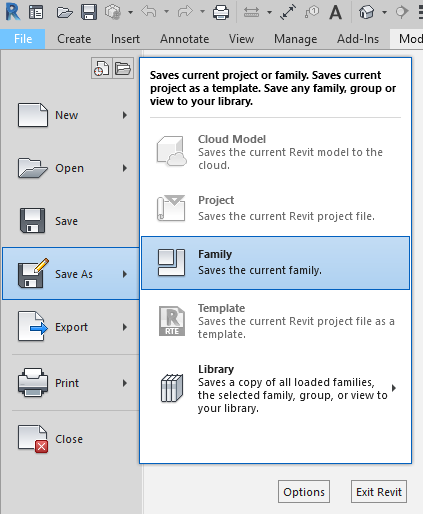
2. Go To “Save As”
In the Ribbon bar to to File -> Save As -> Family
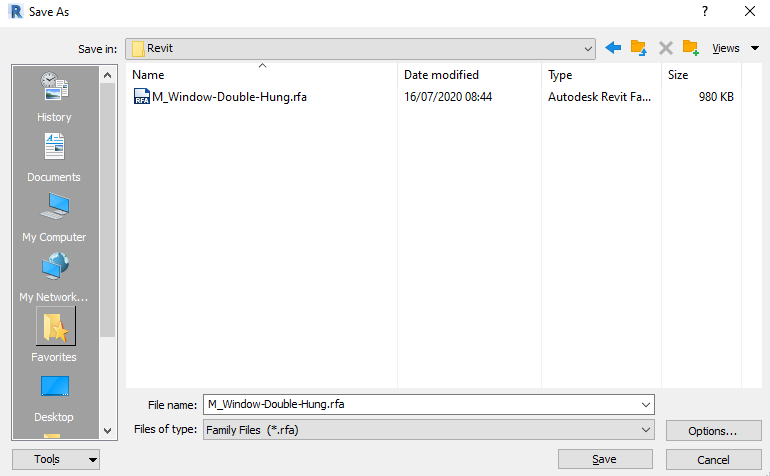
3. Options
In the Save As dialog box, click the “Options” button in the bottom right hand corner.
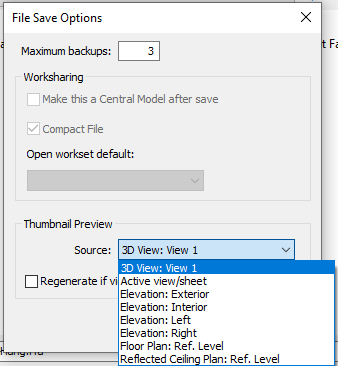
4. Choose New Thumbnail
Under “Thumbnail Preview” choose the new 3D view which you saved earlier and save the family.
Conclusion
Creating a custom thumbnail for your Revit family is easy once you know where to look. Always creating a custom image will allow you choose how best to represent your family.
Find out more about Revit families on the Autodesk Kneowlage Network