Revit Architecture: Basics – Levels
Want to know how to create Floors in Revit? In this exercise I will explain the basics of placing Levels, Levels have many uses but for this exercise we will use them for floors in a building.
In this exercise we will be looking to creating a Ground floor, 1st Floor and a Roof level.
Revit Architecture Basics
Chapter 1: Levels (You are here)
Where to find levels
The level button can be found in the “Architecture” tab, in the section called “Datum”:

Where to use Levels
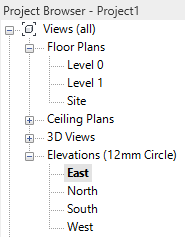
Levels can be placed when you are in an elevation view.
In the project browser navigate to an elevation view and you will notice the Levels button becomes available:
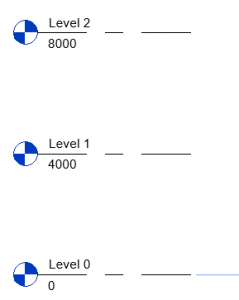
How to Place Levels
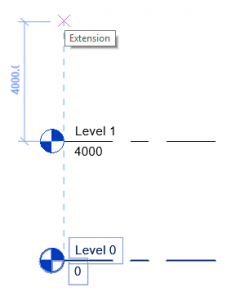
Selecting “Level” from the ribbon bar, click in the project to start drawing your level. Before the first click you will get a temporary dimension to aid you in its placement (this can be altered afterwards if needed):
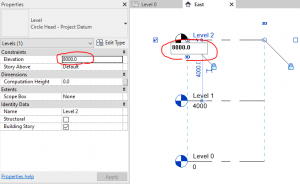
Adjusting levels
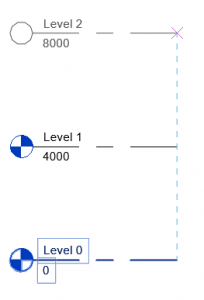
Once placed you can adjust the elevation either by clicking measurement beneath the elevation or in the properties window where it says “Elevation”:
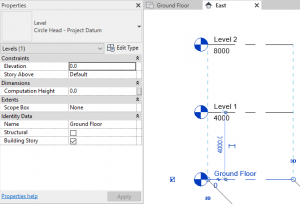
Re-naming Levels
You dont have to use the default names generated by Revit. You can rename in the same manner as adjusting the elevation, either click its name in the main workspace or by selecting it and chenaging the name via the properties window:
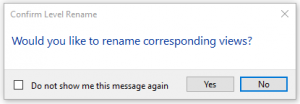
You will get a prompt asking if you would like to rename any corresponding views, select yes:
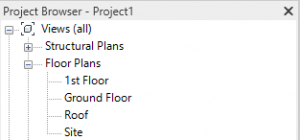
Floor Plans
You will have noticed that as you create and name levels that a new Floor Plan is automatically created in the project browser:
Conclusion
Congratulations, you have learnt the basics of creating levels in Revit. This step is usually done at the beginning of a project however you can create new levels at any stage.
Revit Architecture Basics
Chapter 1: Levels (You are here)
Return to Revit Architecture: Basics
Find out more about Levels on the Autodesk kneowlage Network.